by HJ HOLTZ | Nov 29, 2017 | Client Work, Residential Painting
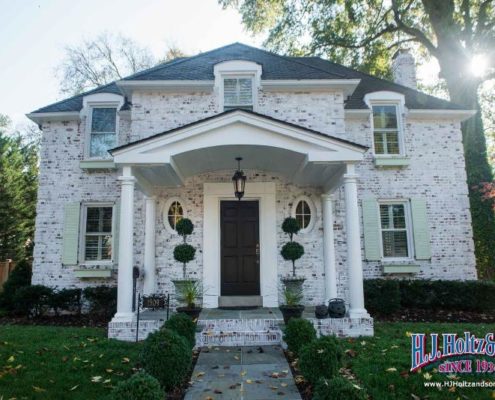
Did you ever what to change the look of your red brick? Many people choose to paint their brick, but there is another option — Limewash. What is Limewash you may ask? It originated in Europe and been in existence for thousands of years. We used Romabio on our project, which is similar to a stain and is absorbed by the brick. Paint, on the other hand, adheres to the top of the brick. The result is a beautiful antique look.
We spoke with our customer, Jon Ritting about why he chose this technique, “we decided to lime wash our house for two reasons. First, a friend and brick mason suggested the technique because lime washed brick can still ‘breath’ as opposed to paint which can trap moisture between the paint/brick and interior walls. Furthermore, painted brick requires maintenance and upkeep after several years, whereas lime wash just looks better over time.
“The second reason was about the final aesthetic lime wash offers a house like ours,” Jon continued. “In our opinion, the lime wash on our house accentuates the architecture and style of the house and makes it stand out in the neighborhood.” Jon’s wife, Patti, echoed his sentiments, “the lime wash technique updated our home while keeping the aged look at the same time. It’s the perfect fit for the style of our home, the neighborhood we live in, and the Richmond metropolitan area.”
Applying the limewash is not easy task (the timelapse to the left makes it look easy!). It takes patience and time. We needed to take into consideration the sun – for that makes the product dry faster. The Ritting’s home had both original brick and newer brick. The limewash on the original brick dried slowly the but the mortar dried quickly. However the opposite occurred when it was applied to the newer brick. The newer brick did not absorb the limewash as well, so it simply beaded up and rolled off! The limewash dried very quickly on the newer mortar, though. We had to adjust the way we applied the product so the limewash matched throughout the exterior. We manipulated the thickness of the product by adding water, but had to carefully protect the surroundings because it can fly all over the place.
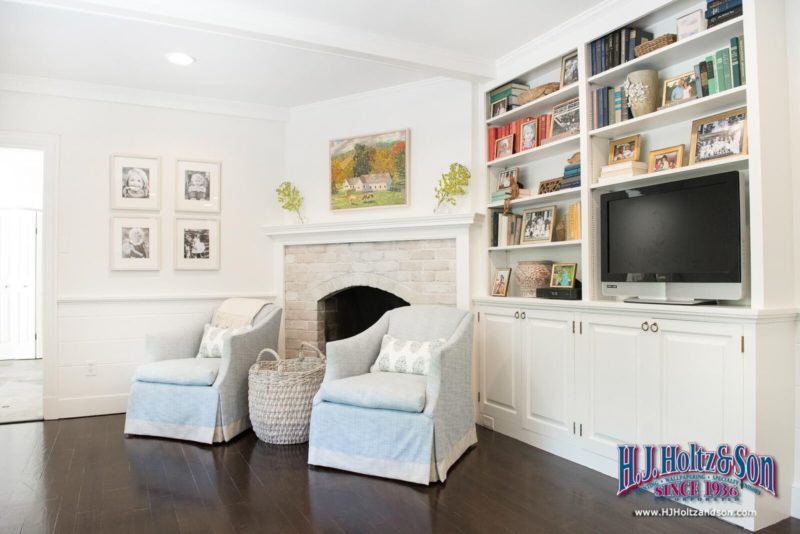
Below are some pictures of the home:
by HJ HOLTZ | Aug 29, 2017 | Client Work, Furniture and Cabinetry
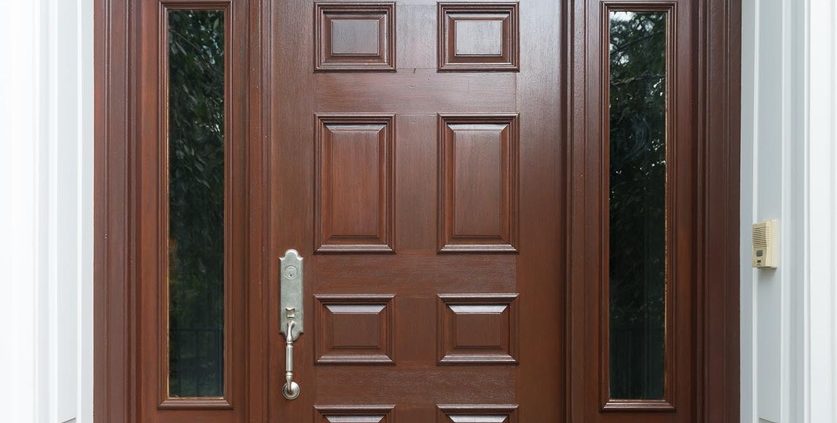
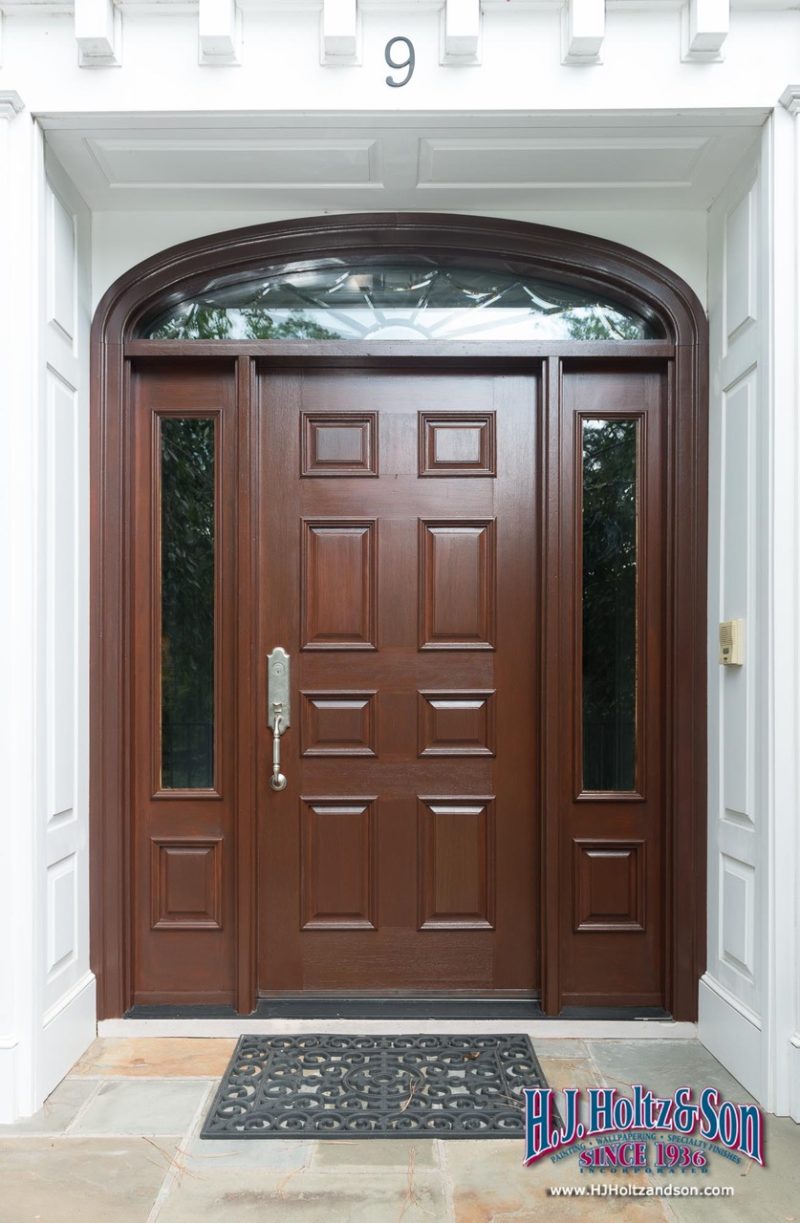
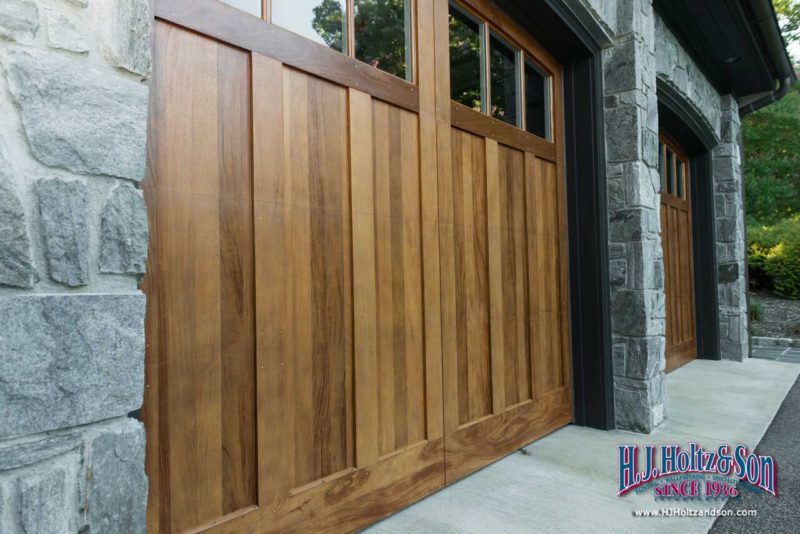
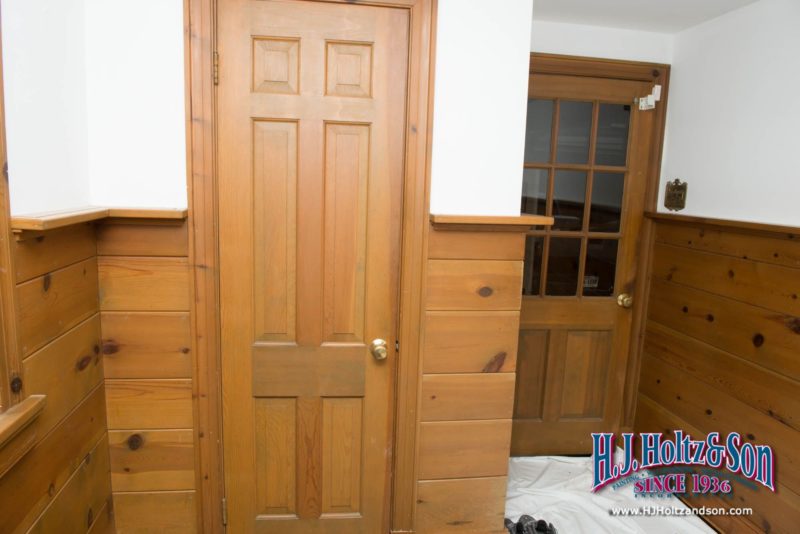
A stained front door makes a beautiful statement. It represents you and your style and is the first thing most people see when they visit your home. However it also is a big investment that needs maintenance. Doors should be hand cleaned with non abrasive cleaners twice a year to get rid of dirt and any mildew. Depending on how much direct sunlight, water and heat your door receives dictates how often it should be refinished. At H.J. Holtz & Son we can restore your stained woodwork to its former glory.
How often your door needs to be refinished depends on the exposure it receives. Doors under porches or doors that face north in our area tend to get less weather and exposure, so they can go years without refinishing. Doors that are more exposed to the elements or that face south may need to be coated annually. The following is a list of signs to look for when determining if you door needs to be refinished.
- Dull surface
- Dry feeling to the door
- Raised grain of the wood
- Noticeable color changes such as light spots or dark streaks
- Obvious peeling of the varnish
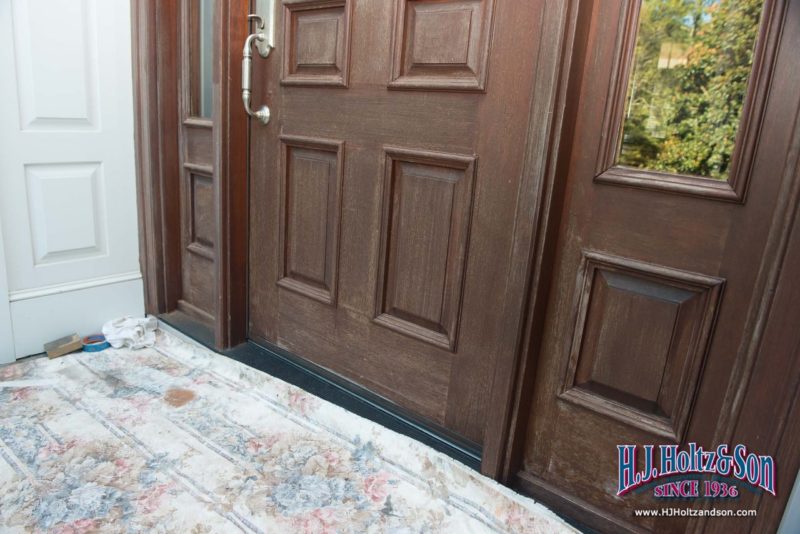
Once you determine that your door needs to be refinished, the first step is to remove all of the hardware and access the wear and tear of the door. Does the whole door need to be striped or just a section? Either way the worn area needs to be stripped and sanded.
This door below shows how the door has weathered over time.
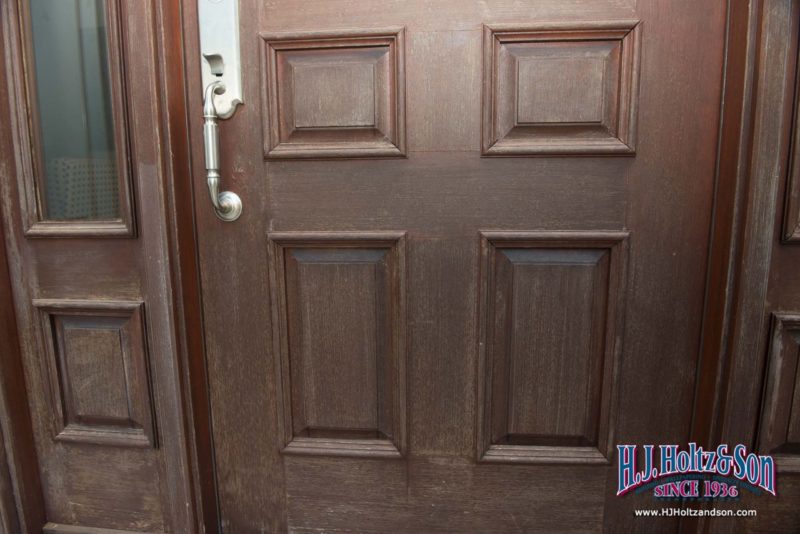
Once the door has been sanded to raw wood, our craftsmen experiment and mix stains to create test samples, ensuring the stain is the color the customer wants. Having an artistic eye is key to the color matching. Once a stain is chosen it is applied throughout the door’s nooks, crannies and crevices.
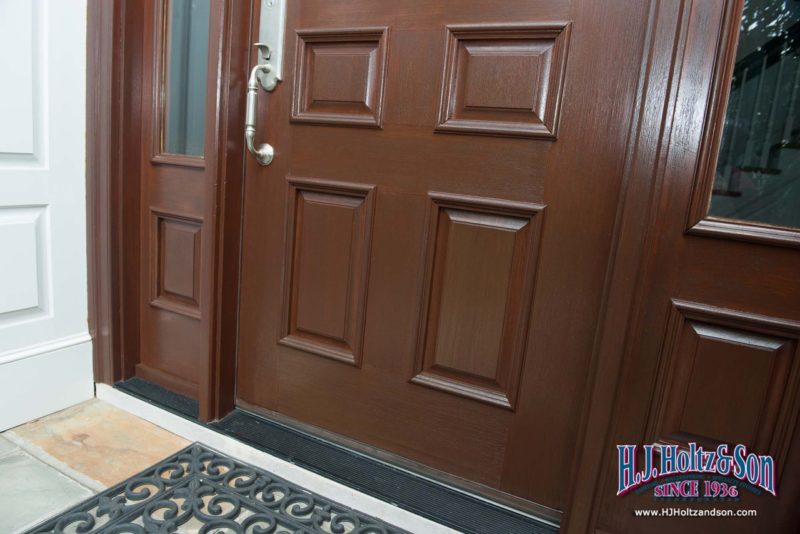
The final step is applying the varnish – a minimum of two coats. We like the oil based Silkkens, which comes in many different sheens. When the time is taken to be detailed oriented and precise, a beautiful refinished door is produced.
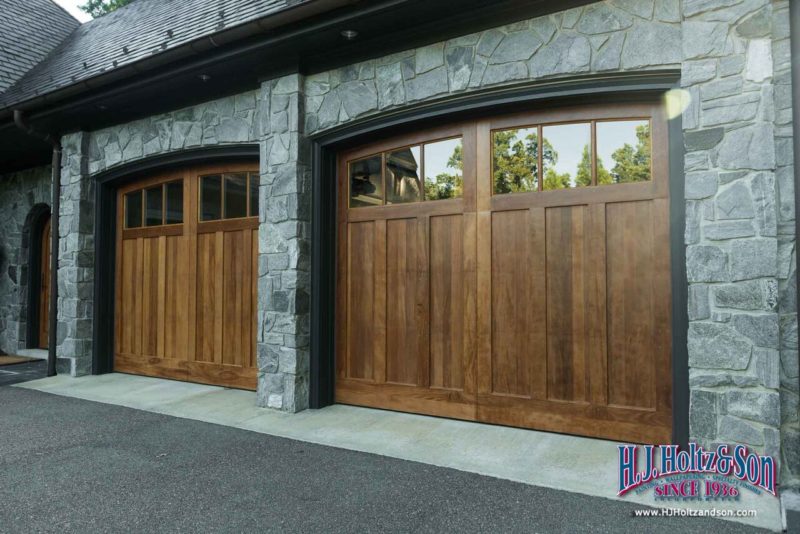
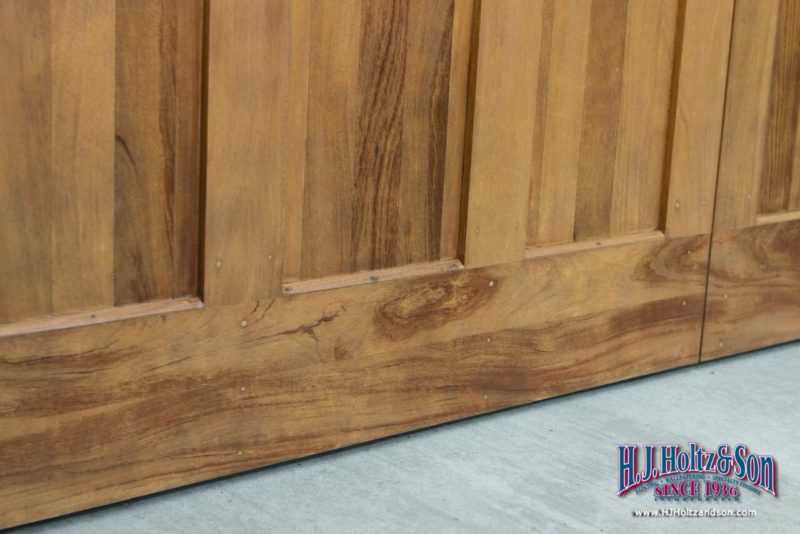
These garage doors have lots of fading in the panels and mouldings due to excessive exposure to the sun and rain.
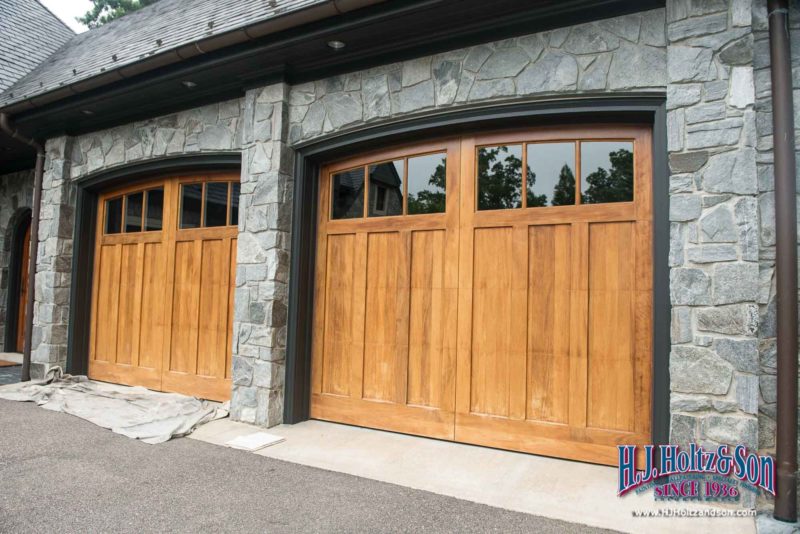
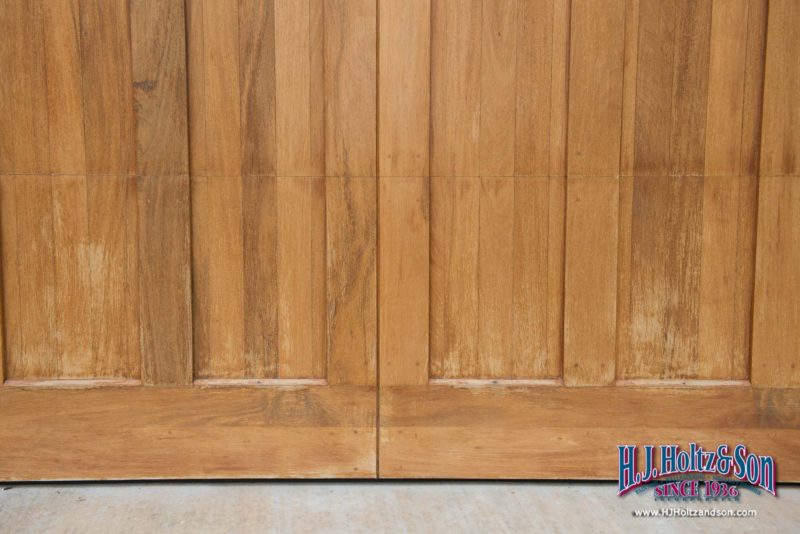
Once the doors are sanded, stained and clear coated, they look as good as new!
When you have professionals that take their time and use their experience to refinish stained woodwork, the outcome is amazing. Call H.J. Holtz and Son at (804) 358-4109 for a free estimate so we can make your doors look brand new!
by HJ HOLTZ | Jul 20, 2017 | Client Work
Once again our team shows that professionally painting kitchen cabinets rejuvenates a kitchen. Check out this video that shows the steps we take to ensure a beautiful, durable result.
by HJ HOLTZ | Jun 6, 2017 | Client Work, Furniture and Cabinetry, Residential Painting
Purchasing a home can be a very exciting time. However, when you purchase an older home that requires a makeover, it can become daunting, especially when the project is of this size and scale. You need to be able to collaborate with a painter that can implement your vision and ideas. Customer Lizzie Cox chose us. Her new home needed a facelift and we were there to help!
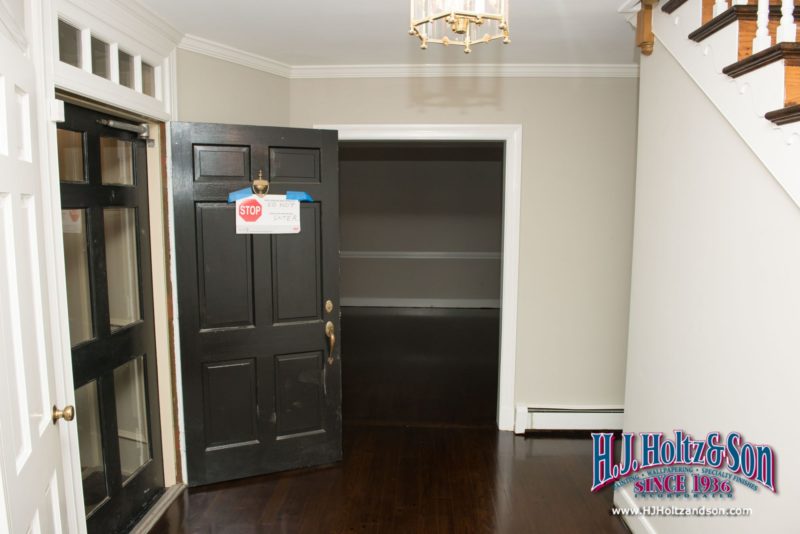
Before…
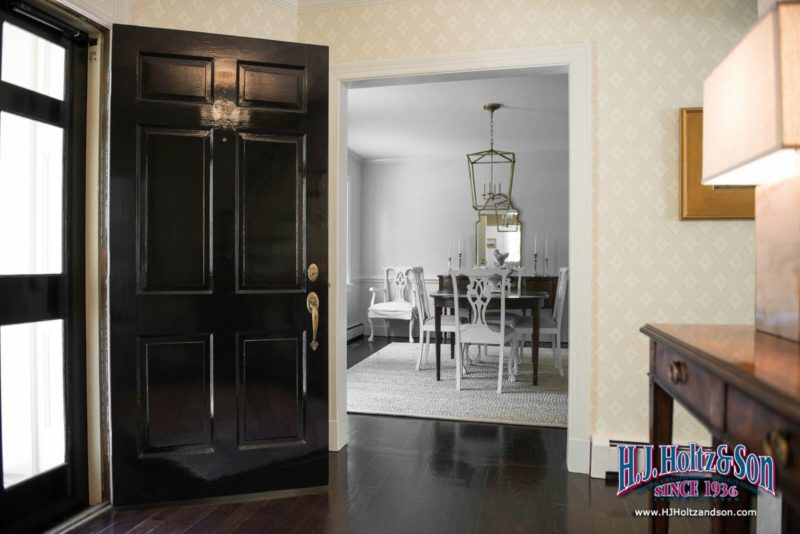
The entrance had neutral walls and trim with a black matte door.
After!
In the Foyer we painted the trim, hung the Farrow and Ball Ranelagh wallpaper and painted the door a high gloss finish.
Before…
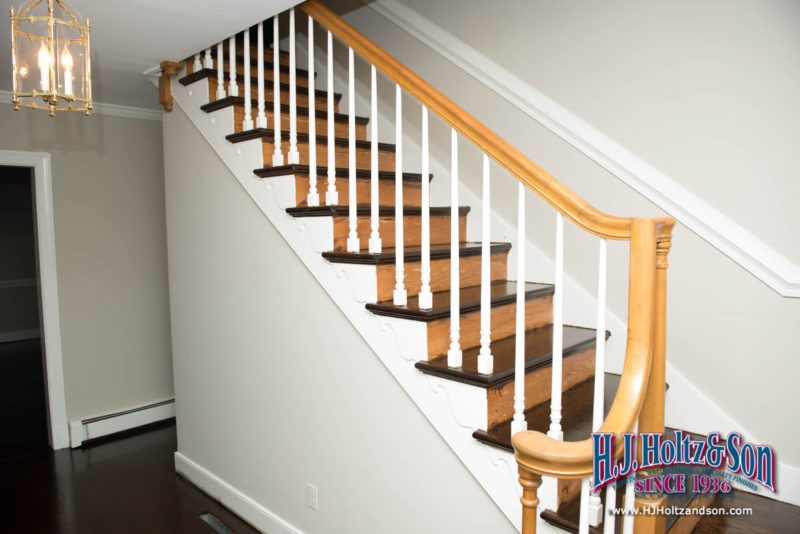
The hallway stairs had wood stained risers and a wooden banister along with monochromatic colors above and below the chair rail.
After!
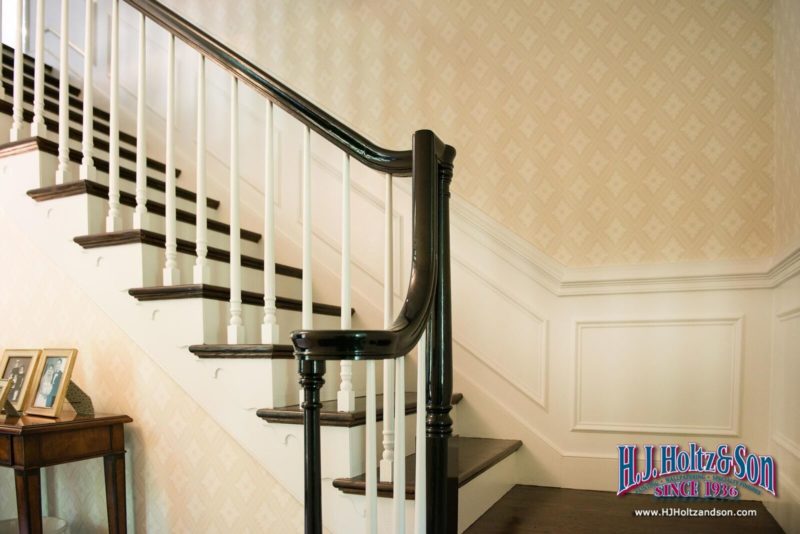
We painted the risers on the steps white, which contrasts nicely with the newly painted black railing. The additional picture molding gives the illusion of wainscoting, which dressed up the foyer.
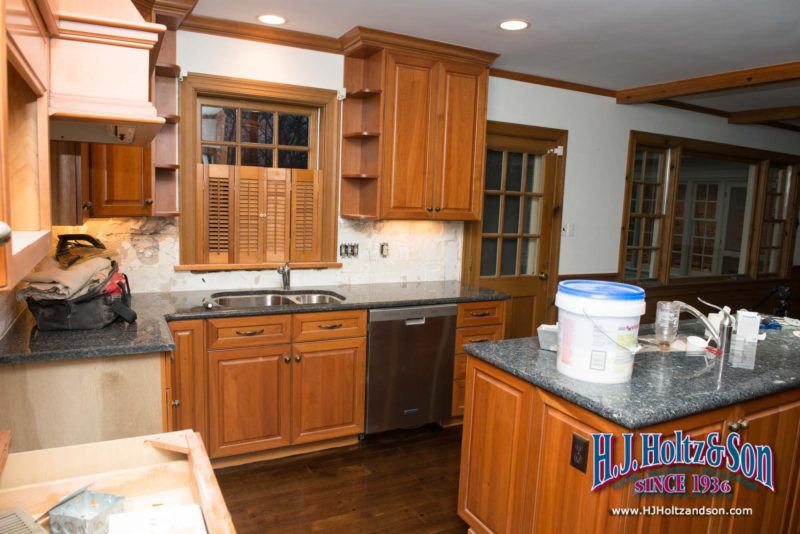
Before…
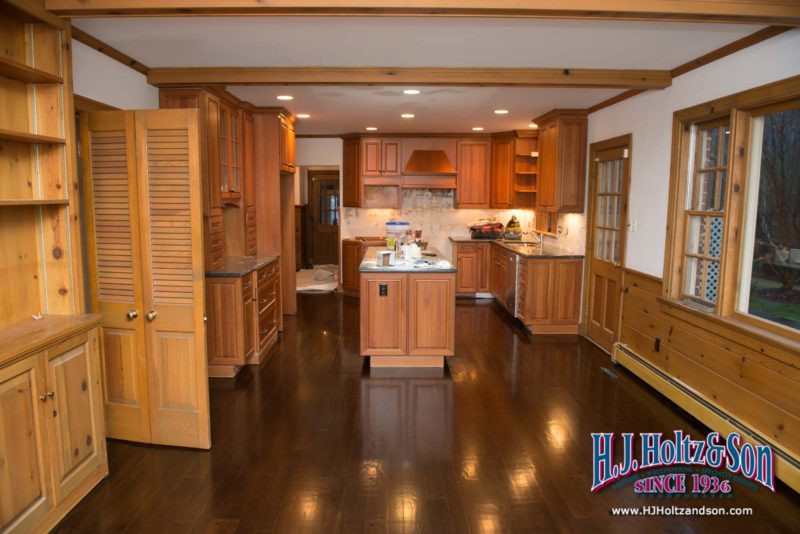
There was a lot of wood stain in the kitchen extending from the beams and carried throughout the trim, the walls and the floors. The cabinets were also wood stained and these elements combined created a closed-in feeling to the kitchen.
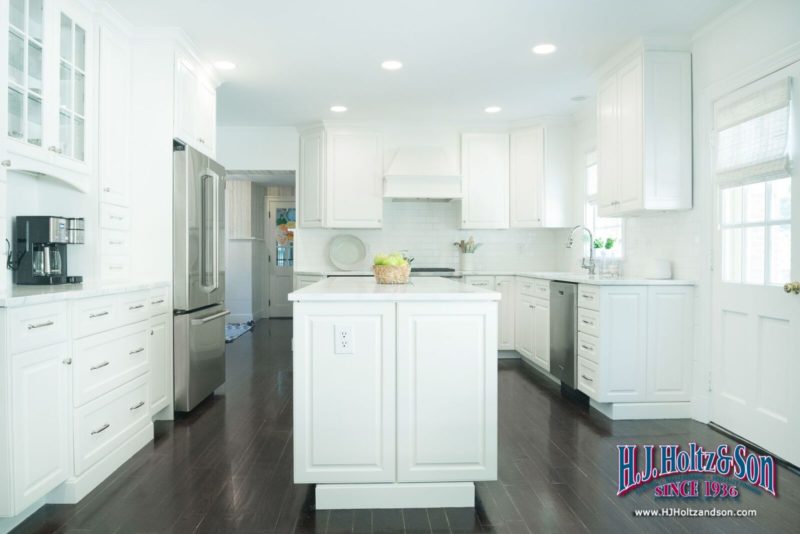
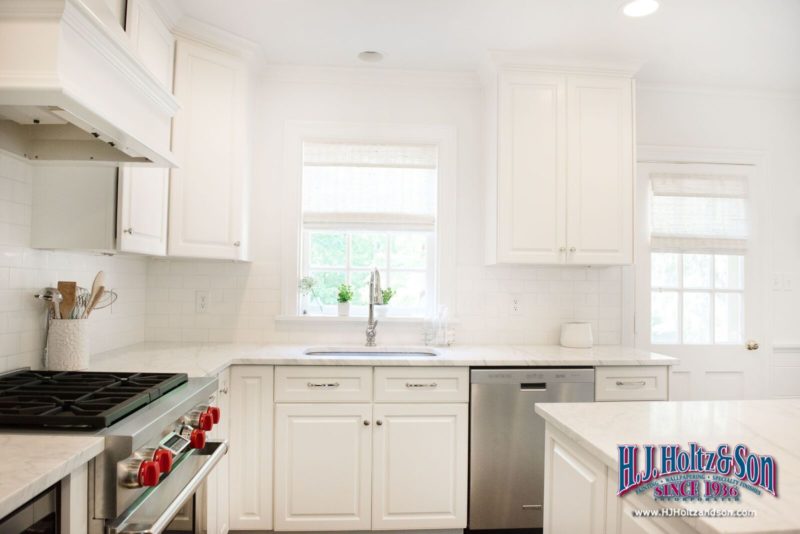
After!
We degreased, sanded and scraped, primed and painted the cabinets. Then we used our in-house spray booth to apply this beautiful Benjamin Moore White Dove. The light-colored cabinets, trim, ceiling beams and walls brightened and enlarged the kitchen!
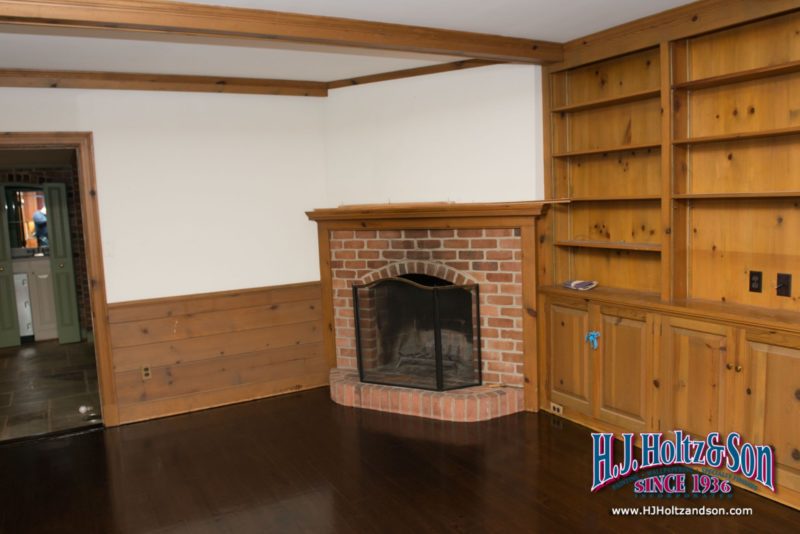
Before…
This area is an extension of the kitchen with a fireplace at the other end.
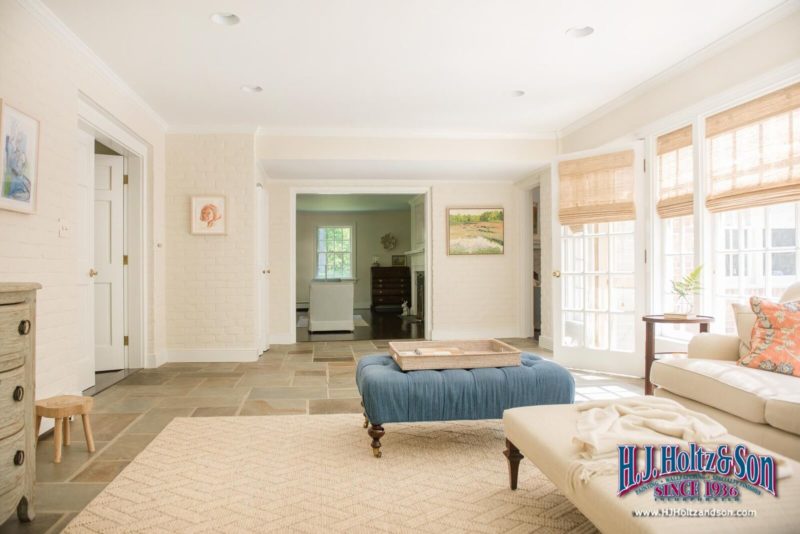
After!
All of the woodwork was painted white, including the bookcase, panels and ceiling beams. Our craftsman Brian Smith whitewashed the fireplace to create this beautiful, uniform look. The brighter walls also make the floor pop!
Before…
A second fireplace was also updated.
After!
The brick on this fireplace was painted black which contrasts beautifully with the wall color.
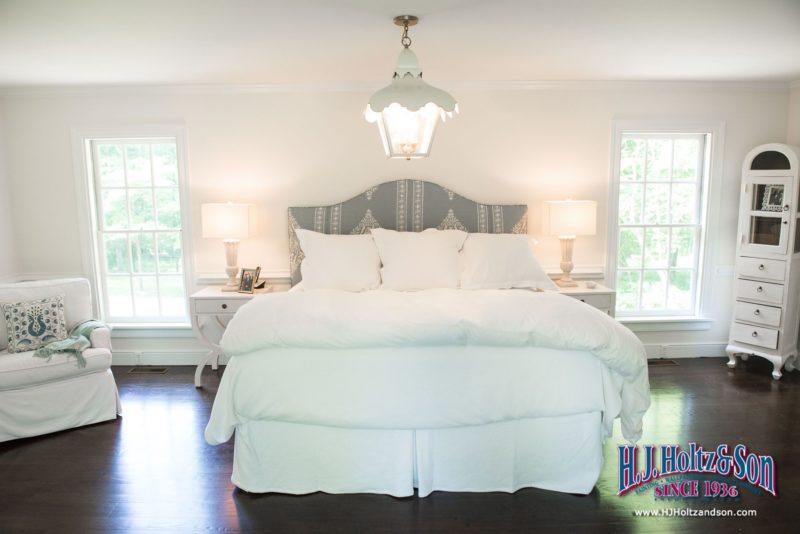
Before…
The master bedroom had colonial blue moldings with white walls.
After!
The white walls and white trim created a modern look in this beautiful bedroom.
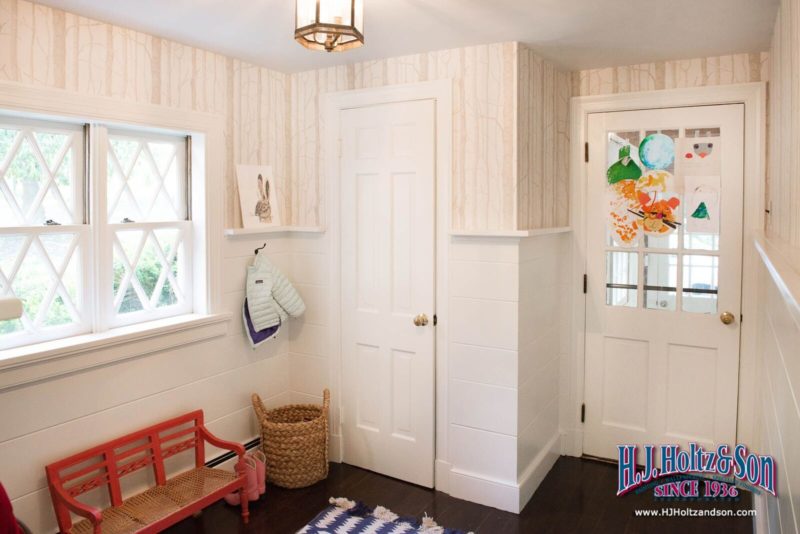
Before…
The heart-of-pine paneled mudroom.
After!
The mudroom looks fabulous! It is amazing that the knots don’t bleed through the paint. The birch tree woods wallpaper by Cole & Son adds dimension and brightness to the whole space.
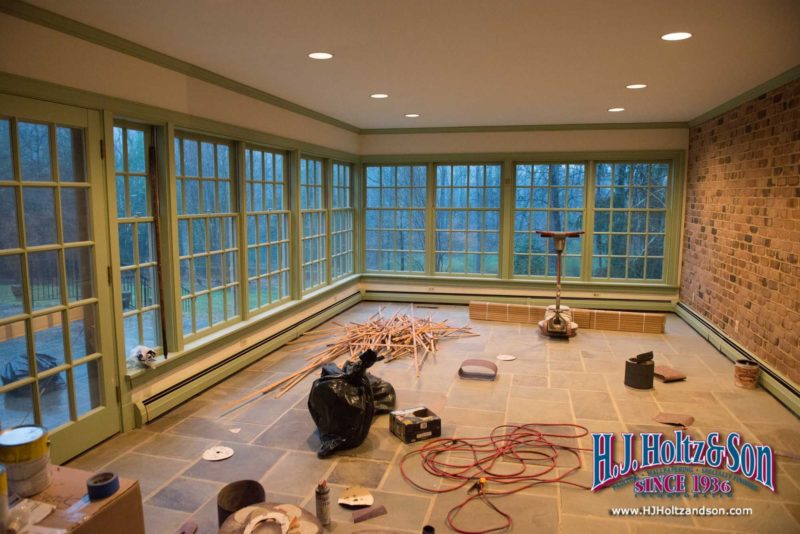
Before…
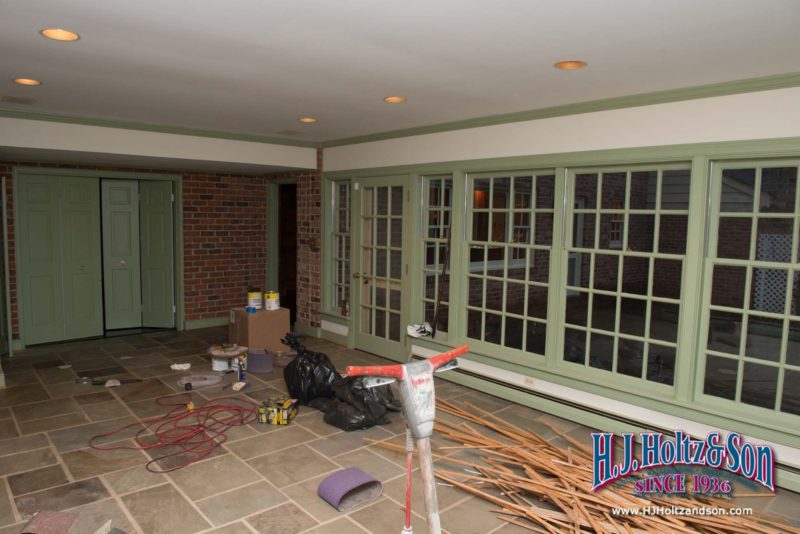
This huge sunroom with plenty of windows for viewing the yard had green trim and an exposed brick wall. It was finished with a flagstone floor.
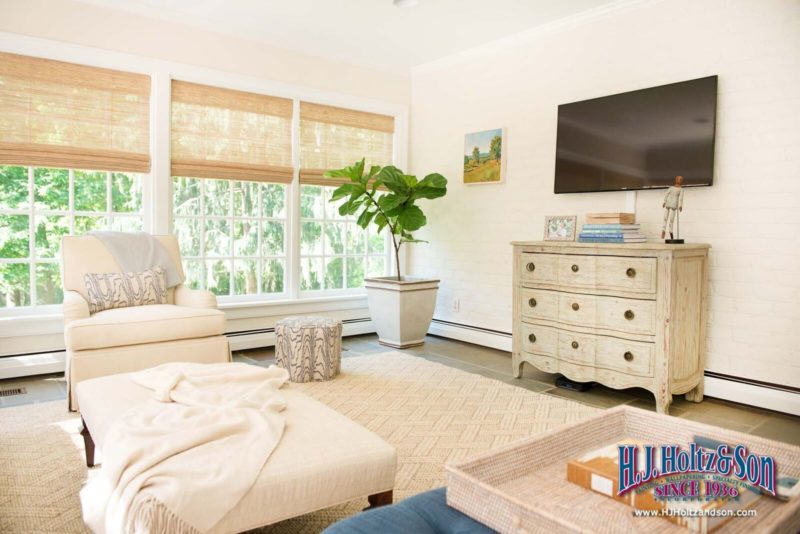
After!
This sunroom looks amazing with the painted brick and trim! The light color in combination with all of the windows creates such a bright, cheery room and brings the outdoors inside. The walls are Feather Down with White Dove trim.
Mrs. Cox had noticed the quality of our craftsmanship through working for designer Suellen Gregory. When I spoke with Mrs. Cox, I asked her why she chose H.J. Holtz and Son. “While working with Suellen I saw the caliber of your work and I love the way you treat clients. I couldn’t imagine working with anyone else.”
She noted that we “work magic” and that she knew exactly what she wanted it to look like. She knew the skill level of H.J. Holtz and Son could execute what she wanted. There was never any other painter considered and she has not looked back once.
Mrs. Cox also shared that her family loved having our craftsmen in her home. They would joke with the family while they ate breakfast in the mornings and were missed when the project was completed.
Mrs. Cox is very happy with our work and loves the transformation. It is stunning to see the before and after pictures. We are thrilled that our customer loves our work!
by HJ HOLTZ | May 3, 2017 | Client Work, Residential Painting
Your home is important because it is your place to sleep, your place to eat, and your place to create memories. It is the first thing people see and it represents you. Maintaining the exterior of your home keeps your house healthy. Paint forms a protective surface on the exterior of your home, safeguarding the underlying materials from weather and moisture. H.J. Holtz & Son can help you keep your home in tip top shape. Below are examples of what we address when we paint the exterior of a home.
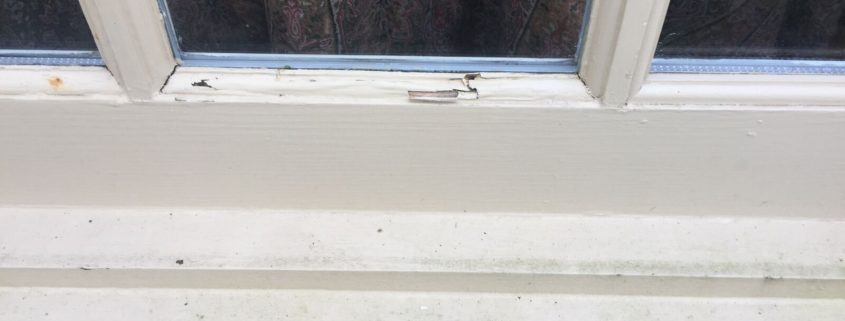
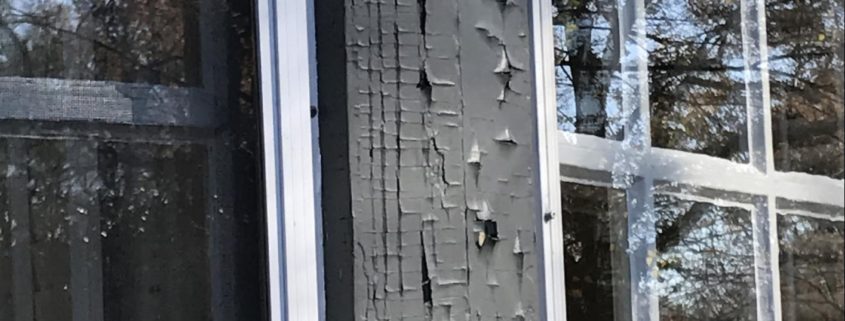
This picture shows cracking and flaking. When dry paint splits the top coat, it will lead to the failure of the paint. We need to remove all of the damaged paint by scraping and sanding. Then by adding a quality primer and paint, the exterior will be protected.
Peeling is when paint lifts from the surface because of poor adhesion. We prepare the surface by scraping off all of the loose paint. Then we always spot prime bare areas to seal the wood which promotes adhesion for the top coats of paint.
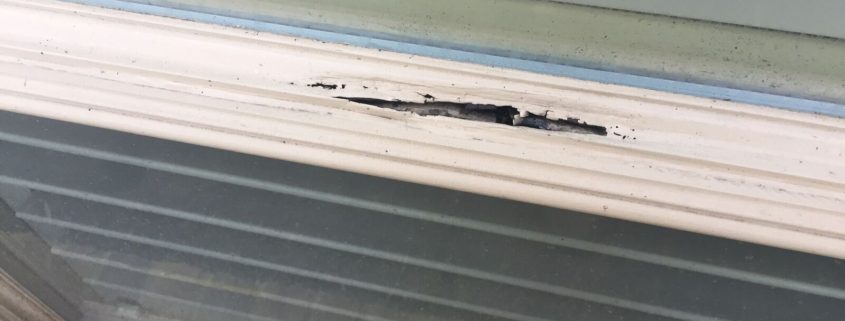
Wood rot is extremely destructive to your home. This is when moisture gets absorbed by the wood. We remove all of the wood rot and repair with a two part epoxy. If the area is too large, the damaged area will be replaced with wood, PVC or another non wood composite material. Then we will sand, caulk and use a quality primer and paint.
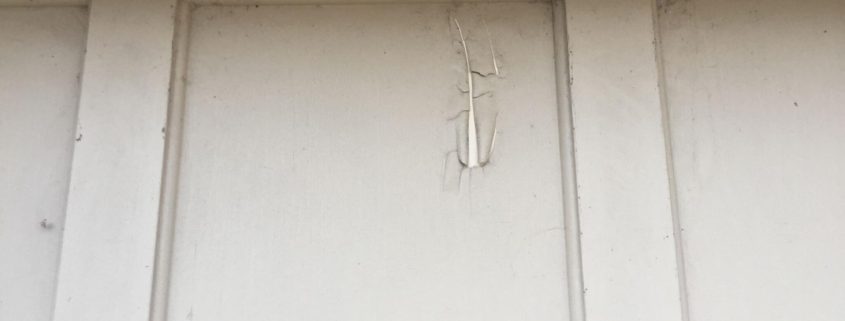
Alligatoring is another thing paint does when it ages. When the topcoats expands and contracts the brittle old paint underneath cracks and lets go of the substrate and it causes cracking and peeling. We sand the surface and use a quality primer to fix the surface.
There are many other exterior problems to look for on your home’s exterior including:
Blistering – on painted exterior walls
Rusting – nail heads and iron fences
Paint Incompatibility – too many layers of different types of paints used over the years
Chalking – when paint decomposes and becomes a loose fine powder
Dirt – dust and debris adhere to the paint film
Fading – premature color discoloration
Mildew and Mold – living organisms that grow and spread
With the proper care, repair, preparation and products, H.J. Holtz & Son can extend the life of your exterior paint, making your home a visually and structurally sound place to live. Call us today for a free estimate so we can help keep your house in the best shape possible!

by HJ HOLTZ | Mar 16, 2017 | Client Work, Wallcoverings
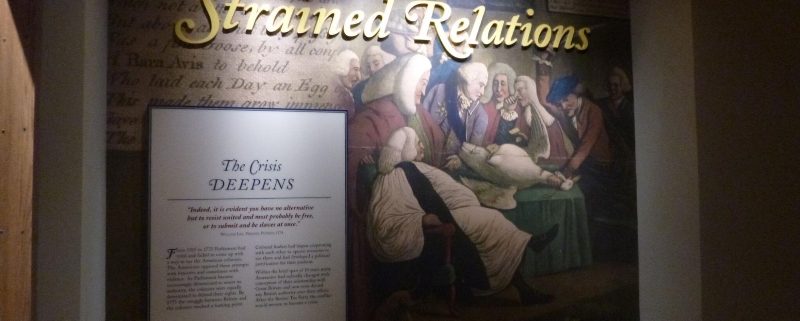
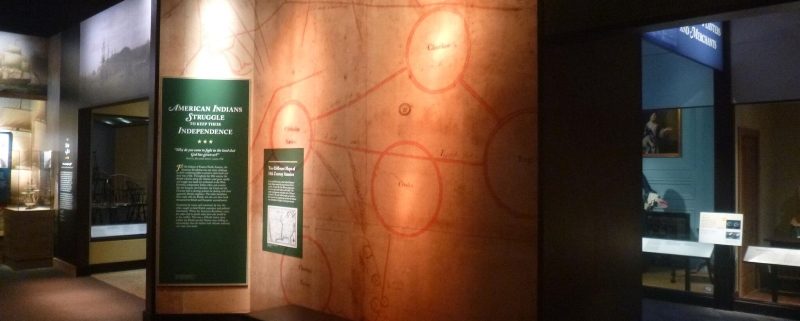
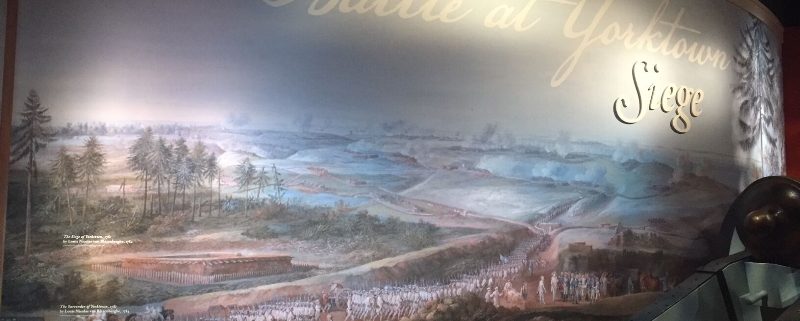
The craftsmen at H.J. Holtz and Son had the privilege of helping preserve and share American history by hanging graphic murals in the The American Revolution Museum at Yorktown. This new facility, which is replacing the Yorktown Victory Center in Yorktown, VA, will host a grand opening celebration from March 23-April 4, 2017 to officially launch the new museum.
The graphic murals created by Keith Farby are a visual backdrop for the museum’s artifacts and exhibits. Hanging them takes extreme precision and attention to detail. If the graphic is off by ⅛”, everyone will notice it.
The curator and the head of the museum laid out the graphic murals in the correct order. The murals were 54” wide and 14-15 ft. tall. When hanging such large murals, we have to hang from left to right, making sure each panel lines up with the previous panel all along the seam. This required two to three installers to set the top, middle and bottom of each panel. Several of the murals were made up of 10 or more panels.
There were many obstacles to overcome while hanging these graphic murals. In one instance we had to hang the mural in the glass case with hardly enough room for an installer and a ladder. Not only was it challenging to place it perfectly in the case, in that situation the mural had stretched on the press. Therefore no matter how we manipulated it, it would not line up. Ultimately, it had to be reprinted. We used a lift for several men to hang a high scenic mural, and in one section, we had to secure a ladder on concrete faux dirt! There were also curved walls that we hung murals on, which required extra patience to make sure everything lined up.
We always go into a job with the mindset of treating it like it is our own home. Working at the Yorktown Museum was no different. Our experience and attention to detail made the final product look fabulous on the walls and we hope the visitors enjoy all of the history at their fingertips!